Complete Car Wrap Maintenance & Care Guide
Protect your investment and keep your car wrap looking pristine for years with our comprehensive maintenance guide. Learn professional care techniques, seasonal strategies, and troubleshooting solutions.
Car wrap maintenance is crucial for maximizing the lifespan and appearance of your vinyl investment. According to industry research on PVC films, properly maintained wraps can last 5-7 years while maintaining their vibrant color and protective properties. This comprehensive guide covers everything from daily care routines to seasonal protection strategies, troubleshooting common issues, and professional maintenance tips. Whether you drive a Tesla, luxury vehicle, or everyday car, the principles of wrap care remain consistent across all applications. For specific vehicle guidance, see our Tesla wrap maintenance guide. Regular maintenance not only preserves aesthetics but also protects your original paint underneath, making wraps a smart long-term investment. The key to wrap longevity lies in understanding the material properties and implementing consistent care practices. Modern vinyl technology has made maintenance easier than ever, with improved durability and stain resistance. However, proper technique remains essential—improper cleaning methods can cause irreversible damage even to high-quality wraps. This guide synthesizes professional installer knowledge with real-world experience to provide actionable maintenance strategies. For a complete overview of all maintenance aspects, consult our 2025 comprehensive care guide which includes detailed product recommendations and advanced techniques.
Proper Washing Techniques
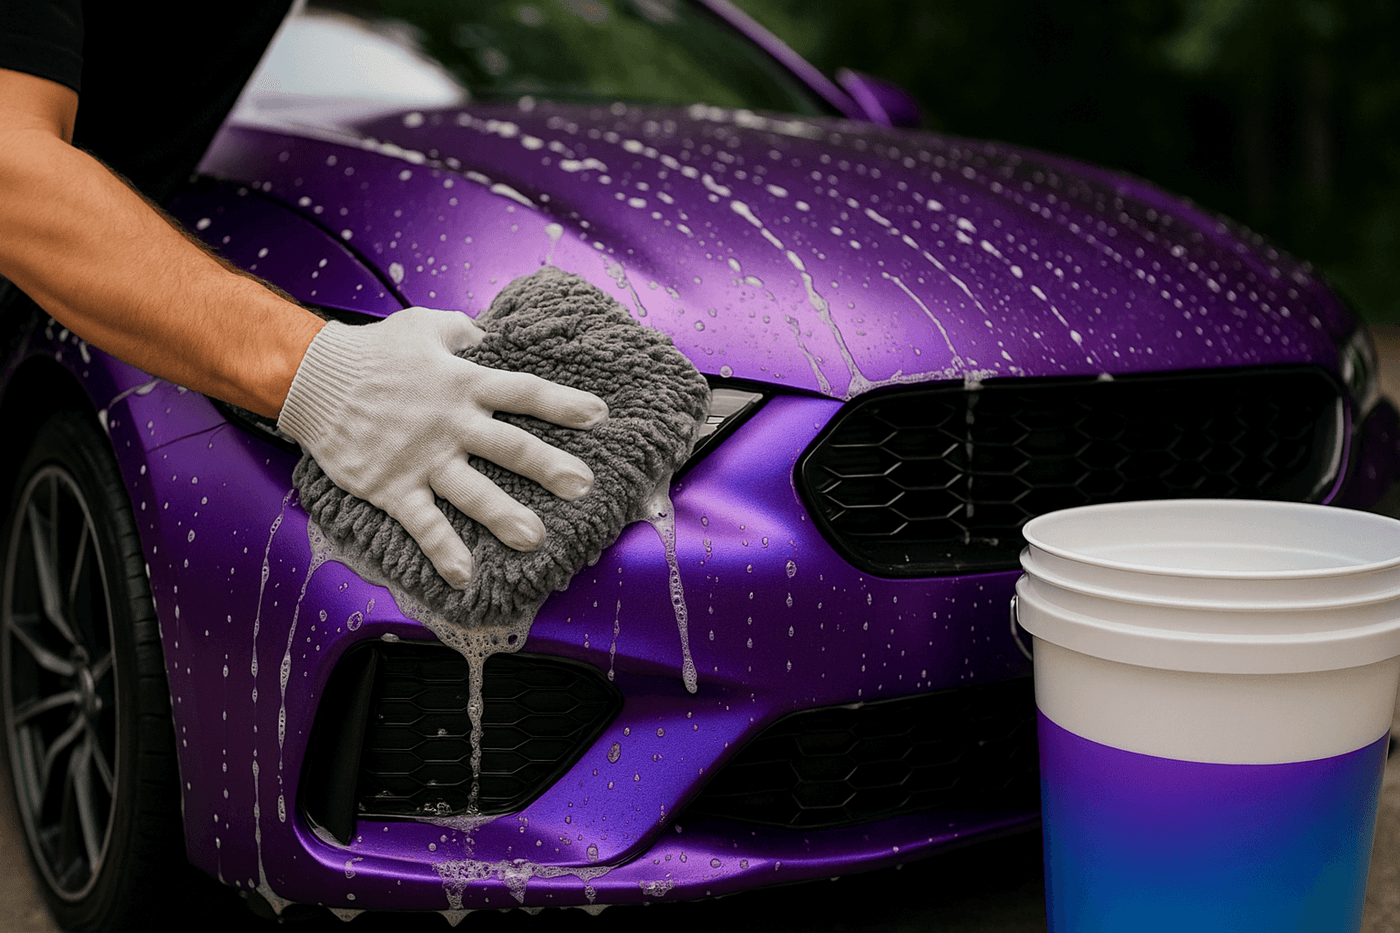
Washing is the cornerstone of car wrap maintenance, yet improper technique causes more damage than any other factor. Understanding correct washing methods protects your investment and maintains the wrap's appearance. The foundation of proper washing is using the right materials: pH-neutral car soap specifically formulated for automotive finishes or vinyl wraps, soft microfiber wash mitts (never brushes, sponges, or rags), two buckets (one for soapy water, one for rinsing), and high-quality microfiber drying towels. According to microfiber technology research, these synthetic fibers safely lift dirt without scratching delicate surfaces.
Begin washing from the top and work downward, as lower panels accumulate more dirt and debris. Pre-rinse the entire vehicle with clean water to remove loose dirt—this crucial step prevents scratching during washing. Mix your pH-neutral soap according to manufacturer instructions in one bucket, keeping the second bucket filled with clean rinse water. Dip your wash mitt into the soapy water, wash one panel using straight, overlapping strokes (never circular motions), then rinse the mitt in the clean water bucket before reloading with soap. This two-bucket method prevents dirt from being transferred back onto the vehicle. Work systematically across all panels, refreshing your soap and rinse water as needed. Pay special attention to lower panels, wheel wells, and behind mirrors where dirt accumulates.
Never wash in direct sunlight or on hot surfaces—heat causes soap to dry quickly, leaving spots and residue. Early morning or evening washing works best. Water temperature should be cool to lukewarm—never hot. After washing all panels, rinse thoroughly from top to bottom, ensuring all soap is removed. Soap residue can cause spotting and streaking. For drying, use a clean, high-quality microfiber drying towel or chamois designed for automotive use. Pat or gently drag the towel across surfaces—avoid rubbing with pressure. For hard-to-reach areas like mirrors and trim, use smaller microfiber towels. Compressed air works well for drying panel gaps and seams where water can hide. For comprehensive washing instructions with video demonstrations, visit our complete cleaning guide.
UV Protection & Environmental Defense
UV radiation poses the greatest threat to vinyl wrap longevity, causing molecular degradation, color fading, and material brittleness over time. Ultraviolet light from the sun breaks down the polymer chains in vinyl, leading to chalking (a powdery surface appearance), discoloration, and eventual material failure. While quality wraps include built-in UV inhibitors, additional protection significantly extends lifespan. The most effective defense is minimizing sun exposure through covered parking, garages, or car ports whenever possible. When outdoor parking is unavoidable, orient your vehicle to minimize sun exposure on the most visible panels, or use high-quality car covers specifically designed for wrapped vehicles.
Vinyl-specific sealants provide an additional UV protection layer. These products create a sacrificial barrier that absorbs UV radiation before it reaches the vinyl, while also enhancing water beading and making future cleaning easier. Apply vinyl sealants every 3-6 months, following the manufacturer's instructions carefully. Application typically involves cleaning and drying the surface completely, applying the sealant with a microfiber applicator in straight lines, and buffing to a uniform finish. Different sealant formulations exist for gloss, matte, and satin finishes—always use the appropriate product for your wrap type. Some professional-grade sealants include ceramic technology for enhanced durability and protection.
Environmental contaminants also threaten wrap integrity. Acid rain contains sulfuric and nitric acids that can etch vinyl surfaces if not removed promptly. Industrial fallout deposits fine metallic particles that bond to vinyl and cause staining. Tree sap contains resins that harden and become increasingly difficult to remove over time. Bird droppings are highly acidic and can permanently stain or damage vinyl within 24-48 hours. Road salt used in winter creates a corrosive environment that accelerates vinyl degradation. The strategy for environmental defense is twofold: prevention through covered parking and protective sealants, and prompt removal of contaminants when they occur. Inspect your vehicle regularly for contaminants and address them immediately. For seasonal protection strategies specific to your climate, consult our year-round seasonal care checklist.
Regular Inspection & Preventive Care
Proactive inspection catches small issues before they become expensive problems. Develop a regular inspection routine: weekly quick checks for visible damage or lifting, monthly detailed inspections of all edges and seams, and quarterly comprehensive assessments including careful examination of all panels, edges, and potential problem areas. During inspections, look for edge lifting (especially around door handles, mirrors, and bumpers), bubbling or delamination, discoloration or fading, scratches or gouges, staining from contaminants, and areas where vinyl appears stretched or stressed. Use good lighting—preferably natural daylight—and inspect from multiple angles to reveal issues that might not be immediately obvious.
Edge sealing is critical preventive maintenance. Vinyl edges are vulnerable to lifting, especially in high-stress areas that experience repeated flexing or exposure to water. During monthly inspections, run your fingernail along all edges—any lifting should be addressed immediately. Re-seal lifted edges using controlled heat from a heat gun (160-180°F) and firm pressure with a squeegee. This process reactivates the adhesive and creates a new bond. Pay special attention to door edges, bumper seams, mirror mounts, fuel door edges, and anywhere vinyl wraps around to a hidden surface. Properly maintained edges can last the full wrap lifespan, while neglected edges may fail within months.
Document your wrap's condition with photographs taken at installation and during subsequent inspections. This documentation helps track degradation over time, provides evidence for warranty claims if needed, and guides maintenance decisions. Create a maintenance log noting washing dates, sealant applications, repairs performed, and any issues discovered. This systematic approach helps you identify patterns—for example, if certain areas consistently show problems, you can adjust your maintenance routine accordingly. Many wrap failures result from minor issues that went unnoticed until becoming severe. A few minutes of regular inspection saves hours of repair work or costly panel replacement. For Tesla owners, our Tesla-specific maintenance guide addresses unique considerations for electric vehicles and their sensitive sensors and cameras.
Recommended Maintenance Schedule
Follow this schedule to maintain optimal wrap condition throughout its lifespan. Adjust frequency based on your driving conditions, climate, and storage environment. For detailed guidance, see our ultimate maintenance guide.
Weekly
- Quick visual inspection for damage, lifting edges, or contamination
- Spot clean visible dirt, bird droppings, or bugs
- Check for new chips, scratches, or stress points
- Ensure no debris is trapped in panel gaps or seams
Bi-Weekly (Every 1-2 Weeks)
- Complete hand wash using pH-neutral soap and two-bucket method
- Clean wheels, wheel wells, and undercarriage areas
- Dry thoroughly with microfiber towels, including all crevices
- Remove any accumulated contaminants (bugs, tar, tree sap)
- Inspect wash water for unusual discoloration indicating staining
Monthly
- Deep clean all surfaces, including hard-to-reach areas
- Detailed inspection of all panel edges and seams for lifting
- Re-seal any lifted edges with heat gun and pressure
- Clean and dress trim, tires, and non-wrapped surfaces
- Check for color fading by comparing less-exposed areas to highly-exposed panels
- Address any minor damage or scratches before they worsen
Quarterly (Every 3 Months)
- Apply vinyl-specific sealant for UV and environmental protection
- Comprehensive inspection by professional installer recommended
- Document wrap condition with photographs from all angles
- Clean and protect all glass and non-wrapped surfaces
- Review maintenance log and adjust care routine as needed
- Consider professional detailing for hard-to-remove contaminants
Essential Do's and Don'ts
Always Do These
- Hand wash regularly with pH-neutral soap and soft microfiber materials
- Use the two-bucket method to prevent scratching from dirt
- Dry completely after washing using high-quality microfiber towels
- Park in shade or covered areas whenever possible to minimize UV exposure
- Remove contaminants immediately—bird droppings, bugs, tree sap within 24-48 hours
- Apply vinyl sealant every 3-6 months for UV protection
- Inspect edges monthly and re-seal any lifting with heat and pressure
- Use products specifically formulated for vinyl wraps or automotive finishes
- Test new products on inconspicuous areas before full application
- Follow manufacturer guidelines for your specific wrap type and brand
- Store vehicle indoors when possible, especially in extreme weather
- Maintain detailed records of cleaning, maintenance, and any issues
Never Do These
- Use automatic car washes with brushes—they lift edges and scratch vinyl
- Apply traditional car wax or polish—these damage vinyl and alter finish
- Use abrasive cleaners, scrubbing pads, or harsh chemicals
- Wash in direct sunlight or on hot surfaces—causes spotting
- Use high-pressure washers improperly—maintain distance and use wide spray patterns
- Ignore lifting edges—small problems become big ones quickly
- Let contaminants sit—acids and resins cause permanent damage
- Use circular washing motions on matte finishes—creates glossy spots
- Apply silicone-based products—they're difficult to remove and attract dirt
- Scrape ice or snow from wrapped surfaces—use proper ice melters
- Park under trees that drop sap or near industrial areas with fallout
- Use dull or dirty washing tools—always use clean, quality materials
Seasonal Care Strategies
Different seasons present unique challenges for car wrap maintenance. Adjust your care routine based on seasonal conditions and local climate. For comprehensive seasonal guidance, see our complete seasonal care checklist.
🌸 Spring Care
- Deep clean to remove winter salt, grime, and road residue
- Inspect thoroughly for damage that occurred during winter
- Re-seal all edges that may have lifted during cold weather
- Apply fresh sealant to prepare for summer UV exposure
- Address pollen promptly—it's mildly acidic and can stain
- Check for water damage from spring rains in seams and edges
- Remove tree sap before it hardens as trees begin producing sap
☀️ Summer Care
- Park in shade or use car covers—UV exposure peaks in summer
- Increase washing frequency due to more frequent use and road trips
- Apply UV protectant more frequently (every 2-3 months)
- Remove bugs immediately—summer means more insect impacts
- Check for heat damage like bubbling in extreme temperatures
- Wash in early morning or evening to avoid hot surfaces
- Monitor for fading on sun-exposed panels and reapply sealant as needed
🍂 Fall Care
- Remove leaves promptly—wet leaves can stain and hold moisture
- Clean more frequently during leaf-falling season
- Prepare for winter with thorough cleaning and fresh sealant
- Inspect for summer damage like fading or lifting from heat exposure
- Address any repairs before winter conditions make them worse
- Clean wheel wells thoroughly before winter salt application begins
- Consider professional detailing to address any accumulated damage
❄️ Winter Care
- Remove road salt immediately—it's highly corrosive to vinyl
- Wash more frequently to prevent salt buildup (weekly in heavy salt areas)
- Use warm (not hot) water for washing in cold temperatures
- Avoid ice scrapers on wrapped surfaces—use proper de-icers instead
- Check edges regularly—cold makes vinyl brittle and prone to lifting
- Park indoors when possible to avoid temperature extremes
- Be gentle with frozen wrap—allow vehicle to warm before aggressive cleaning
Common Issues & Solutions
Edge Lifting or Peeling
Clean the lifted area and underlying surface with isopropyl alcohol, let dry completely, apply controlled heat with a heat gun at 160-180°F while maintaining 6-8 inches distance, press firmly with a squeegee for 10-15 seconds, and allow to cool. For persistent or large areas, consult a professional installer. Prevention: inspect edges monthly and reseal as needed. Learn more in our maintenance guide.
Color Fading or Discoloration
Fading indicates UV damage and cannot be reversed—prevention is key. Increase parking in covered areas, apply UV-protective sealants every 2-3 months, and consider professional color restoration or panel replacement for severe fading. Modern wraps are more fade-resistant, but prolonged UV exposure affects all vinyl. For specialty finishes, see our specialty finish guide.
Water Spots or Streaking
Water spots form when mineral-rich water dries on vinyl. Prevent by drying immediately after washing or rain exposure using microfiber towels. Remove existing spots with vinyl-safe detailer spray or diluted isopropyl alcohol applied with microfiber cloth. For stubborn mineral deposits, use distilled white vinegar diluted 1:1 with water (test first). Prevent recurrence by using distilled water for final rinse during washing.
Scratches or Scuff Marks
Minor surface scratches may respond to gentle heat application—use a heat gun at low temperature to soften the vinyl, allowing it to self-heal. Deep scratches that penetrate the vinyl layer cannot be repaired and require professional panel replacement. Prevention: use only soft materials for washing, avoid abrasive cleaners, and be cautious in tight parking spaces. Consider paint protection film over high-impact areas.
Staining from Contaminants
Remove staining agents immediately—the longer they remain, the more difficult removal becomes. For organic stains (bird droppings, bugs, sap), use isopropyl alcohol or vinyl-safe bug remover. For fuel stains, wash immediately with soap and water. For tar, use tar remover specifically labeled as vinyl-safe. For stubborn stains, professional detailing may be necessary. Some stains, especially from prolonged exposure, become permanent and require panel replacement.
Bubbling or Delamination
Small bubbles (under 1/4 inch) often disappear within weeks as air escapes through the vinyl. Larger bubbles may indicate installation issues or adhesive failure. Attempting DIY repair of large bubbles risks further damage—consult your installer or a professional wrap shop. Bubbling from heat exposure indicates serious adhesive failure requiring panel replacement. Prevention: avoid excessive heat exposure and maintain proper installation temperatures during initial application.
Professional Maintenance Products
Use only high-quality, vinyl-safe products for optimal wrap care. These professional-grade solutions are specifically formulated for car wraps and won't damage the vinyl surface or alter the finish. For complete product recommendations by wrap type, visit our comprehensive maintenance guide.
Frequently Asked Questions About Car Wrap Maintenance
Wash your wrapped vehicle every 1-2 weeks to prevent dirt and contaminant buildup that can damage the vinyl over time. The frequency depends on your driving conditions—vehicles exposed to highway driving, industrial areas, or harsh weather may require weekly washing. According to professional car washing standards, regular cleaning prevents oxidation and maintains the wrap's protective properties. Use only pH-neutral car soap specifically designed for vinyl wraps or automotive finishes. Avoid letting dirt sit on the surface for extended periods, as particles can embed in the vinyl and cause permanent staining or scratching. For areas with heavy pollution or near the ocean (salt exposure), increase washing frequency to weekly. During winter months with road salt application, wash more frequently to prevent chemical damage. Always use soft microfiber towels or mitts—never brushes or abrasive materials. The two-bucket wash method works well: one for soapy water, one for rinsing your mitt. For complete washing instructions and techniques, see our detailed cleaning guide.
Avoid automatic car washes with rotating brushes, as they can lift edges, cause scratches, and damage the vinyl surface. The harsh bristles and strong chemicals used in many automatic washes are too aggressive for vinyl wraps. Touchless automatic car washes are acceptable but not ideal—they use high-pressure water and strong chemicals that can still affect wrap edges and seams. The safest washing method is hand washing with proper technique and materials. If you must use an automatic wash, choose a touchless facility that uses gentle, pH-neutral soaps and allows you to inspect your vehicle immediately afterward for any damage. Never use car washes with spinning brushes, cloth strips, or any mechanical contact. The friction from these systems can catch on wrap edges and peel the vinyl. Additionally, automatic dryers with forced air can lift poorly adhered edges. Many professional installers void warranties if automatic car washes are used. For busy schedules, consider professional hand wash services that specialize in wrapped vehicles. Learn more about washing best practices in our ultimate automotive film maintenance guide.
Never use traditional car wax, polishing compounds, abrasive cleaners, solvents (like acetone or paint thinner), harsh degreasers, or cleaners containing petroleum distillates on vinyl wraps. These products can damage the vinyl surface, remove protective UV coatings, cause discoloration, or dissolve the adhesive. Carnauba wax and similar products designed for paint create a glossy buildup on vinyl that's difficult to remove and can alter the wrap's intended finish—especially problematic for matte and satin wraps. Avoid anything with high pH levels (above 9) or low pH levels (below 6), as extreme pH can degrade vinyl. Skip automatic dishwashing detergents, household cleaners like Formula 409 or Windex, and any product containing bleach or ammonia. Don't use tire cleaners or wheel cleaners on wrapped surfaces, as these are highly caustic. Avoid oil-based products, silicone sprays, and degreasers not specifically labeled as vinyl-safe. For specialty finishes like matte, satin, or metallic wraps, use only products specifically formulated for those finishes. Our specialty finish guide provides detailed product recommendations for different wrap types.
Remove bird droppings, tree sap, bugs, and other organic contaminants immediately—within 24-48 hours if possible. These substances contain acids and resins that can permanently stain or etch vinyl if left on the surface. For fresh bird droppings, spray with warm water and let sit for 2-3 minutes to soften, then gently wipe away with a soft microfiber towel. Never scrape or use abrasive materials. For dried bird droppings, apply a warm, damp microfiber towel to the area for 5-10 minutes to rehydrate the deposit before gently wiping. Bug removal requires specialized bug remover products safe for vinyl, or isopropyl alcohol (70% concentration or higher) applied with a microfiber cloth. Tree sap is more challenging—soak the affected area with isopropyl alcohol for several minutes, then gently rub with a microfiber cloth. Multiple applications may be necessary for stubborn sap. Some installers recommend using vinyl-safe adhesive removers for difficult sap removal. Always test any cleaning solution on an inconspicuous area first. After removing contaminants, wash the area with pH-neutral soap and water, then dry completely. The longer these substances remain on your wrap, the more difficult they become to remove and the higher the risk of permanent damage. Our seasonal care checklist includes specific strategies for dealing with season-specific contaminants.
Don't use traditional automotive wax on vinyl wraps—it creates unwanted buildup and can alter the finish, especially on matte and satin wraps. Instead, use vinyl-specific sealants and protectants formulated specifically for wrapped vehicles. These specialized products provide UV protection, enhance water beading, and add a protective layer without changing the wrap's appearance. Apply vinyl sealant every 3-6 months for optimal protection, following the manufacturer's application instructions carefully. Quality vinyl sealants help prevent fading from UV exposure, make future cleaning easier by creating a sacrificial barrier, and enhance the wrap's depth and color. Popular vinyl-safe products include spray sealants that apply easily with microfiber applicators. Some products are specifically formulated for gloss wraps, while others work for matte and satin finishes—always verify compatibility with your wrap type. Never use products containing silicone oils, petroleum distillates, or wax. The application process is simple: clean and dry the surface completely, spray the sealant onto a microfiber applicator pad, apply in straight lines (not circles), and buff to a uniform finish. Avoid applying sealants in direct sunlight or on hot surfaces. For warranty considerations and product-specific recommendations, review our specialty finish warranty guide.
With proper care and ideal conditions, high-quality cast vinyl wraps last 5-7 years while maintaining their appearance and protective properties. Several factors influence wrap longevity: installation quality (professional installation significantly extends life), vinyl quality (premium brands like 3M and Avery Dennison last longer), climate conditions (harsh sun, extreme temperatures, and high humidity accelerate aging), storage environment (garage parking versus outdoor exposure), maintenance frequency and technique, and the specific wrap type (cast vinyl lasts longer than calendered vinyl). Vehicles in moderate climates with covered parking and regular maintenance can exceed 7 years, while wraps in extreme conditions with outdoor parking and minimal maintenance may begin deteriorating at 3-4 years. UV exposure is the primary aging factor—prolonged sun exposure causes fading, chalking, and material breakdown. Regular application of vinyl sealants with UV inhibitors helps combat this effect. Temperature extremes also impact wrap life—repeated expansion and contraction from temperature fluctuations can cause adhesive failure and material stress. Proper maintenance extends wrap life significantly: vehicles with consistent bi-weekly washing, quarterly sealant application, and covered storage often reach 7+ years. Conversely, neglected wraps exposed to elements may fail prematurely. For comprehensive longevity strategies, consult our complete maintenance guide which details preservation techniques for maximum wrap lifespan.
Yes, parking in covered areas, garages, or shade dramatically extends wrap life by minimizing UV exposure and protecting from environmental damage. Direct sunlight is vinyl's primary enemy—UV rays cause molecular breakdown, fading, discoloration, and premature aging. Covered parking can extend wrap life by 30-50% compared to constant outdoor exposure. If garage parking isn't available, use car covers designed for wrapped vehicles (ensure they're clean and non-abrasive), seek covered parking structures, or park under trees or building overhangs when possible. Even partial shade protection helps—orient your vehicle so the most visible panels face away from direct sun. Temperature extremes also accelerate aging: extremely hot surfaces (140°F+) from sun exposure can cause adhesive softening and bubbling, while freezing temperatures make vinyl brittle. Covered parking maintains more stable temperatures, reducing thermal stress on the wrap material. Additionally, covered storage protects from bird droppings, tree sap, acid rain, industrial fallout, and other environmental contaminants that damage vinyl. If outdoor parking is unavoidable, increase maintenance frequency—wash more often and apply UV-protective sealants every 3 months instead of 6. Our seasonal care guide provides specific parking strategies for different weather conditions and climates throughout the year.
Address lifting or peeling edges immediately to prevent further damage and water intrusion that can compromise larger areas. For minor edge lifting, you can often re-adhere the vinyl yourself: clean the lifted area and underlying surface with isopropyl alcohol, let dry completely, apply controlled heat using a heat gun at 160-180°F while maintaining 6-8 inches distance, press the heated vinyl firmly against the surface using a squeegee or gloved hand, hold pressure for 10-15 seconds, and allow to cool completely before touching. This process reactivates the adhesive and creates a new bond. For corners and complex curves, you may need to apply heat and pressure multiple times. However, significantly lifted areas (larger than 2-3 inches), peeling that exposes paint, or recurring lifting after multiple repair attempts require professional attention. Professional installers can properly re-adhere or replace damaged sections, ensuring proper adhesion and color matching. Peeling often indicates installation issues (inadequate initial adhesion or surface preparation), environmental damage (excessive UV exposure or temperature extremes), or natural wear from age. Prevent lifting by keeping edges sealed during regular maintenance—inspect all edges monthly and apply heat and pressure as needed. Avoid pressure washing edges and seams directly, as high pressure can initiate or worsen lifting. For warranty coverage and professional repair options, review our warranty maintenance guide.
Pressure washing is acceptable for vinyl wraps if done carefully with proper technique and equipment settings. Follow these critical guidelines: maintain at least 12 inches (30cm) distance from the surface—closer proximity can lift edges or damage vinyl; use a wide spray pattern (25-40 degrees)—never use pinpoint or concentrated streams; keep water temperature below 140°F (60°C)—hot water can soften adhesive and cause bubbling; limit pressure to under 2000 PSI—excessive pressure can penetrate seams and lift edges; never spray directly at panel edges, seams, or any area where vinyl meets trim or body gaps; hold the nozzle at a perpendicular angle to the surface—angled spraying can get under edges; work systematically from top to bottom to prevent dirty water from running onto clean areas. Pay extra attention to vulnerable areas like door edges, bumper seams, mirror mounts, and anywhere vinyl is tucked or wrapped. These areas require even gentler treatment with lower pressure and greater distance. Touchless or low-pressure washing is safer for wraps than high-pressure systems. Never use pressure washers at self-service car washes—these often exceed safe pressure levels and temperature ranges. For best results, pre-soak the vehicle with pH-neutral soap using low pressure or hand application, let the soap dwell for 2-3 minutes, then rinse gently. See our cleaning and maintenance guide for detailed washing techniques and pressure washer recommendations.
Yes, matte, satin, and specialty finishes require significantly different maintenance compared to gloss wraps. Matte wraps are particularly sensitive—never use products designed for gloss finishes, as they will create unwanted shine and permanently alter the appearance. Use only matte-specific cleaners, sealants, and maintenance products. Avoid circular washing motions on matte finishes, which can create glossy spots or streaks—always use straight, linear strokes. Don't apply pressure or excessive friction, as matte surfaces show buffing marks easily. Never wax or polish matte wraps. Satin finishes fall between matte and gloss, requiring moderate care—use products labeled for satin or matte finishes. Gloss wraps are more forgiving and can use standard vinyl care products, but still avoid traditional car wax in favor of vinyl-specific sealants. Metallic, chrome, and color-shift wraps need specialized products that don't dull their reflective properties. Textured wraps (carbon fiber, brushed metal) require gentle cleaning to avoid flattening the texture. Each finish type has unique vulnerabilities: matte shows water spots more readily, chrome shows scratches easily, textured finishes trap dirt in crevices. Always verify that any product you use is compatible with your specific wrap finish—check manufacturer recommendations. For comprehensive care instructions by finish type, including product recommendations and technique demonstrations, see our specialty finish warranty and maintenance guide.
Ready to Keep Your Wrap Looking Perfect?
Browse our selection of professional-grade car wrap maintenance products, from pH-neutral soaps to specialty sealants designed specifically for vinyl wraps.
Shop Products

